


Description
Ocular Housing Anti Cant Indicator By Brandt Built
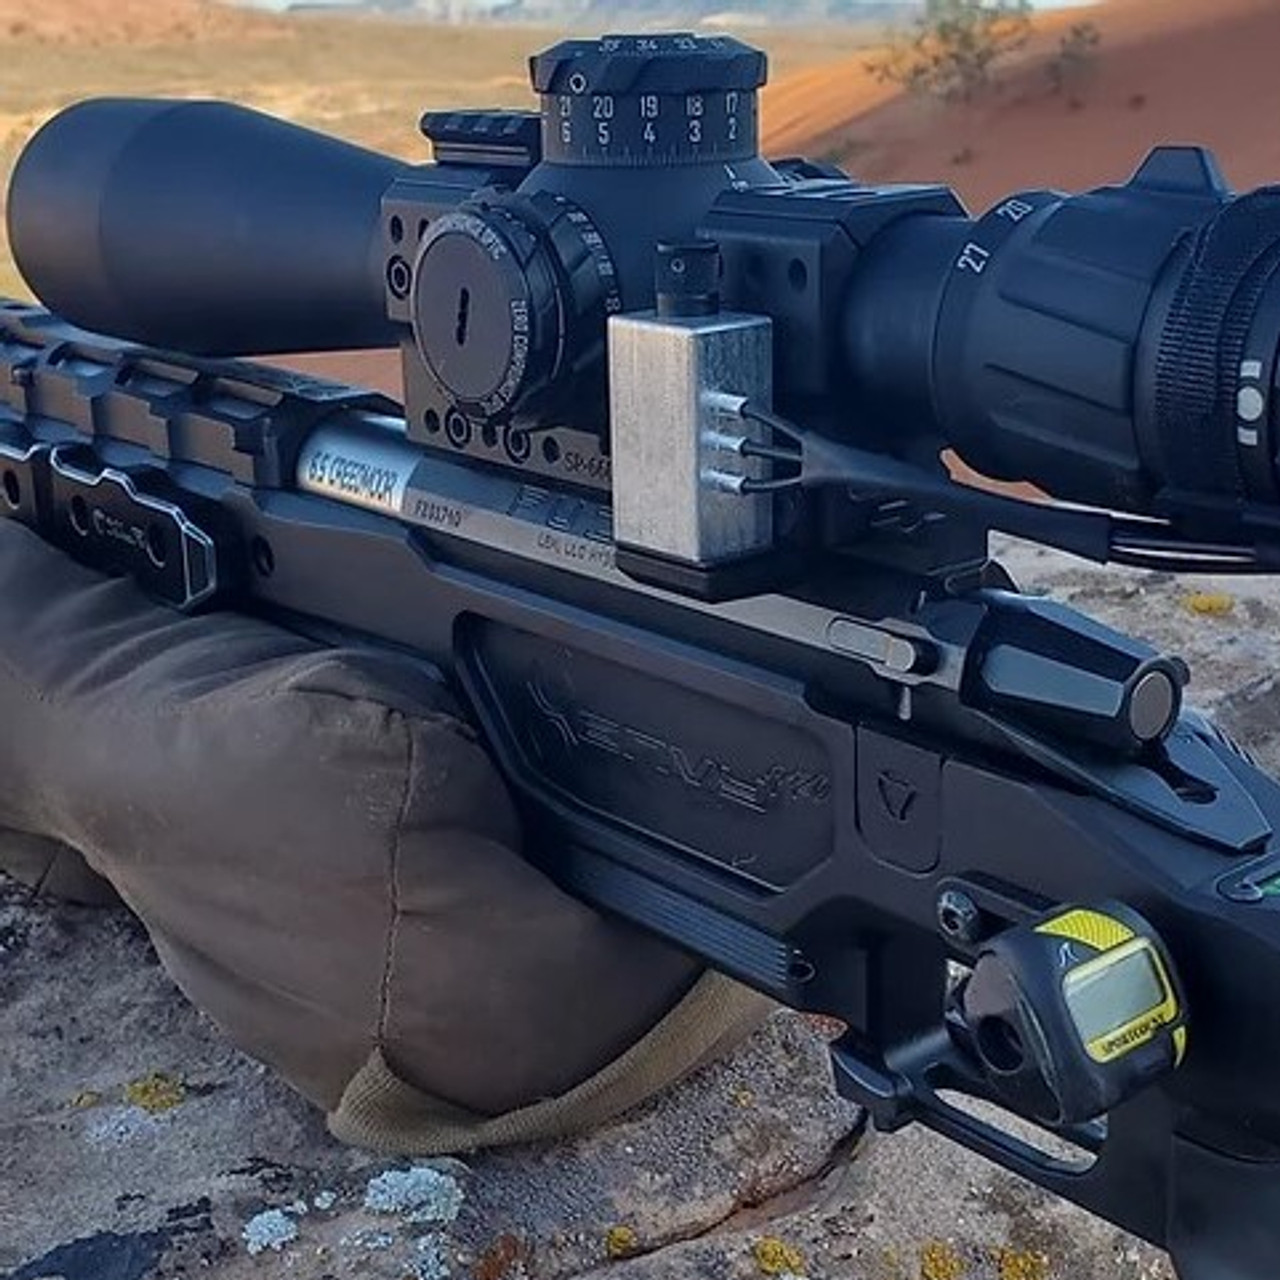
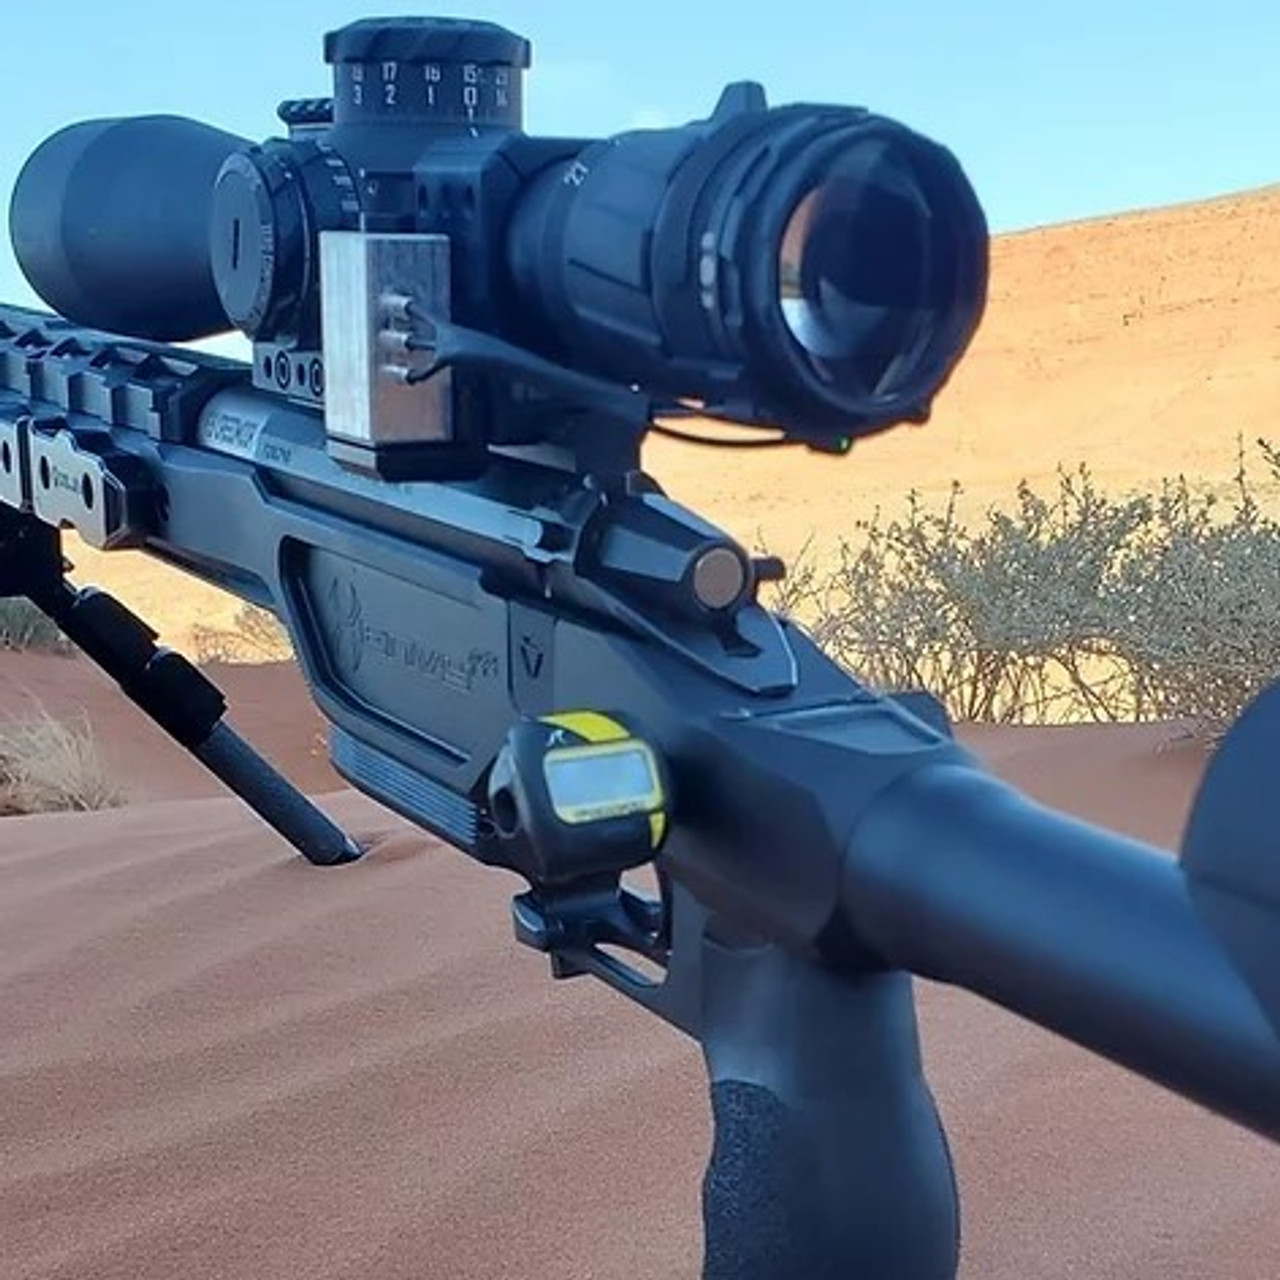
The Brandt Ocular Housing Anti Cant Indicator is an add-on kit for Long Range Arms Send It Levels. This ocular housing anti-cant indicator will fit any ocular house with a diameter between 1.4 and 2.188 inches. The housing is one inch long front to back.
The standard kit works with scopes with non-rotating oculars. The rotating one works with rotating ocular scopes. (NOTE: Night force users must have .72 inches between the rear scope ring and taper leading to the magnification ring.)
What Sets the Brandt Built Anti Cant Different
What makes this add-on unique is how it works without getting in the way of the turrets. With the add-on kit, you can mount the Send It Level at any suggested orientation, even if it is out of view. You can have the level up to 12 inches away from the ocular. If you need more space, you can contact Brandt Built.
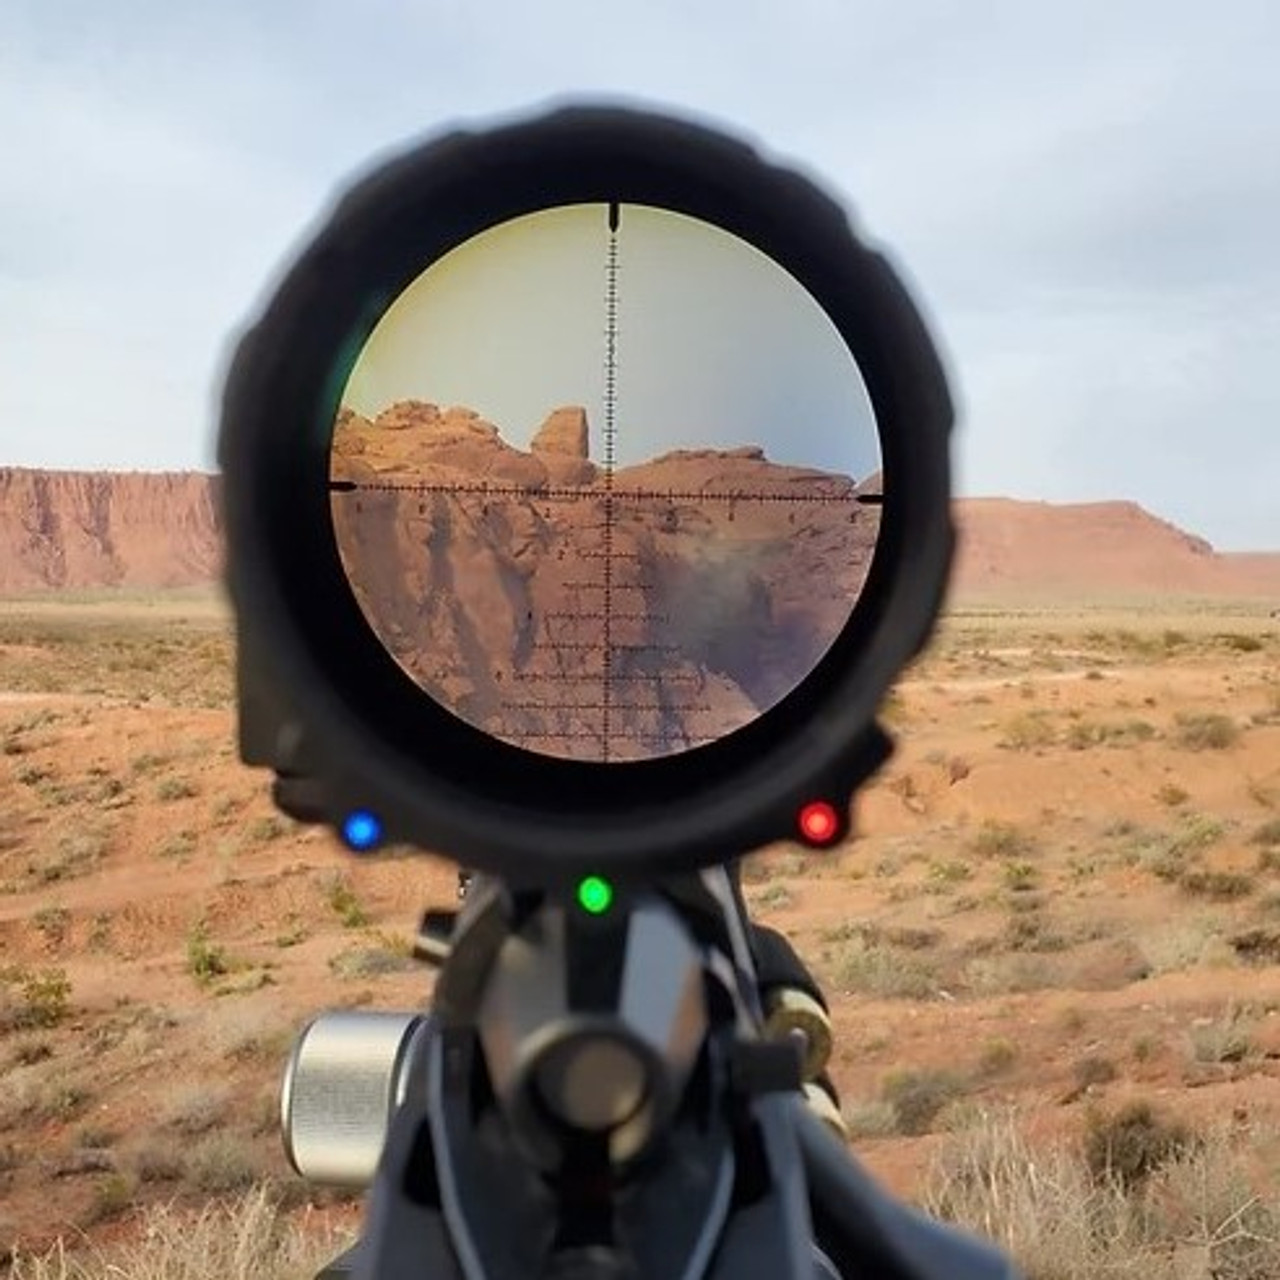
The other benefit of using this add-on kit is that it allows the shooter to look through the scope and take a shot while still seeing the anti cant lights with the same eye. This feature helps the shooter not lapse focus on the reticle.
Because of the position of the cant indicator, this device is ambidextrous. Regardless of which side you favor, the central position of the lights makes it easy to use.
Rotating ocular housing instructions
Step 1: Apply a piece of double sided to the scope tube mount leaving the protective backer on the scope side.
Step 2: The scope tube mount and the rear fiber housing have tapered holes, the fiber and stainless rod will be inserted into the housings from the tapered side.
Step 3: Mount the rear scope tube housing to your scope tube using the supplied Velcro loop. (Don’t peel protective backer on tape yet).
Step 4: Start by getting your bends mapped out at the scope housing side leaving enough straight rod to fully insert into the scope tube housing.
Step 5: Determine where the rear fiber housing will sit. This may vary if you’re running a scope cap. Cut the stainless rod using dikes/ side cutters allowing the rod to fully insert into the housing.
Step 6: You may need to add another slight bend to the rear of the wire to get the fiber housing to sit just right against the ocular or scope cap.
Step 7: Install the rear fiber housing onto the stainless rod using the smaller of the center most holes.
Step 8: Follow standard instructions for remaining install, but note when you heat shrink the fibers it’s worth the time to include the stainless rod as it helps keep everything tidy. You can use two induvial pieces of heat shrink or get everything laid out and poke a small hole in the heat shrink where the fibers intersect the rod and feed it through before shrinking. I prefer the one piece method as it’s a little cleaner. Once complete the last thing you’ll do is remove the backer from the double sided sticky tape and install the scope tube housing using the tape and Velcro strap.
*If you have additional question, feel free to email us at support@anarchyoutdoors.com.
Customer Reviews
-
Poor fit
First of all, instructions would be nice. I had to find a few utube videos to make sure I put it together properly. Secondly, it was a bit of a pain to put the thing together because the 3 holes in the eyepiece are a little too large to snugly hold onto the fiber optic wires. They kept falling out when I tried to fasten the eyepiece onto the scope. All of that said, once I finally got it to stay together, it is a good addition.
Questions & Answers
Shipping & Returns
Related Products

Cross Canyon Arms
CCA Integrated Anti-Cant Level
Our friends down the road at Cross Canyon Arms have done it again. Introducing CCA's integrated AntiCant Level. Instead of worrying about a level that sticks out to the side or forgetting to attach...

Anarchy Outdoors
Riflescope Anti-Cant Bubble Level Attachment
This simple attachment is a must-have for any scope. The bubble level attaches right onto your riflescope tube and helps shooters to see if they are canting too much to one side. This attachment...

Athlon Optics
Athlon Midas G2 UHD Binoculars
The rugged benchmark for all-weather brightness and clarity, Midas G2 UHD roof-prism binoculars are light and slim thanks to a magnesium chassis. With Extra-Low Dispersion Glass lenses, Advanced...

Athlon Optics
Cronus UHD 10×50 Rangefinding Binocular
Just like its namesake, Cronus the King of all the Mythological Greek Titans, this is the King of the Athlon Optic binocular kingdom! Athlon brings to you in the Cronus family, products inspired by a...

Athlon Optics
Athlon CRONUS G2 UHD Binoculars
Designed for serious glassing, with exceptional edge-to-edge clarity, sharp detail enhancement, ultra-clear brightness, and true color representation. Whether you are on your annual hunt for...

Athlon Optics
Athlon Cronus UHD 10x50 Rangefinding Binoculars
Just like its namesake, Cronus the King of all Mythological Greek Titans, this is the King of the Athlon binoculars! Athlon's Cronus family brings products inspired by a combined commitment to...

Athlon Optics
MIDAS G2 PRO UHD 12x50 Binoculars
Experience the world in unparalleled clarity with the MIDAS G2 PRO UHD Binoculars. Engineered to deliver exceptional optical performance, these binoculars redefine your outdoor adventures. Equipped...

Leofoto
Leofoto BC-03 Modular Binoculars Adapter for Tripod Mount - S1 Kit
Leofoto BC-03 Hands Free Modular Binoculars Adapter for Tripod Mount Arca Compatible The rapid-release BC-03 Binocular Tripod Adapter allows for quick and easy connection and disconnection